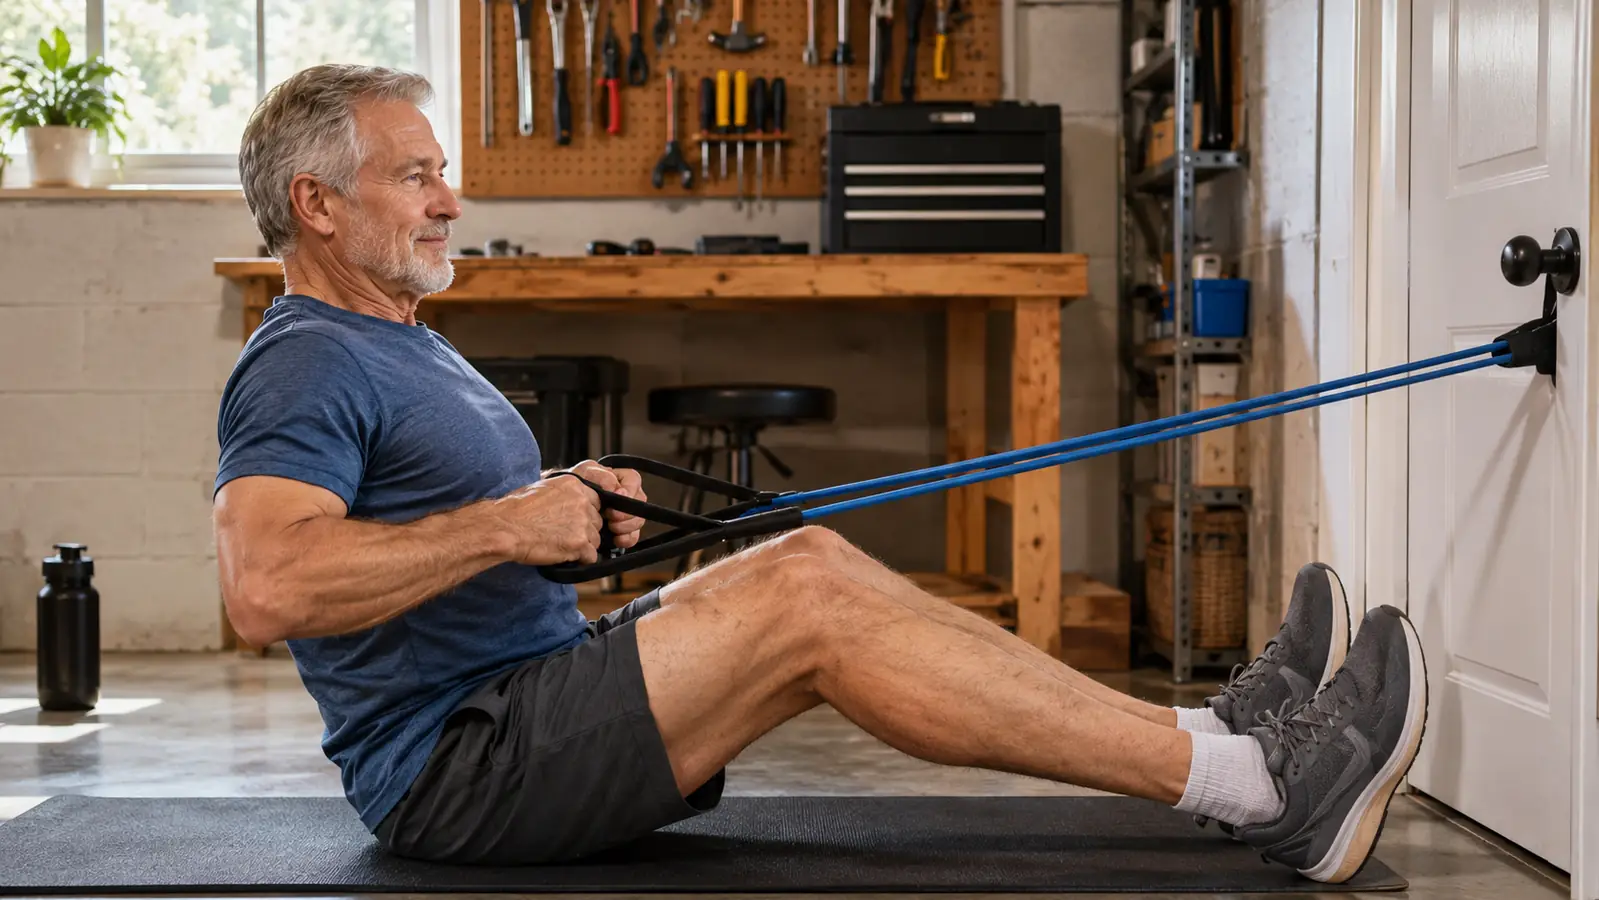
Here is what I remember most about turning 61: I could not get off the floor. My grandkids had asked me to sit down and play, and when it was time to stand up, I had to roll onto my hands and knees and use the couch for leverage. A week later I tried to lift a bag of mulch out of the trunk, and I had to set it back down. That was the moment I admitted I needed to do something about my strength. I am 66 now. I have been training in a corner of my basement for about five years, three or four mornings a week, and the WHATAFIT resistance bands are the reason it stuck. Not the only reason. But the main one.
If you are in your 60s and the idea of starting strength training feels like too much, I understand. A gym membership feels like a promise you will not keep. A rack of free weights feels like an investment in a person you are not sure you are anymore. I tried both. The gym membership lasted a month. The weights gathered dust next to the workbench. Resistance bands are different. The whole set weighs about two pounds and packs into a carry bag. You can start with the lightest tube on day one, in your living room, in your regular clothes. No commute. No locker room. No waiting for a machine. This article is the routine I wish someone had handed me five years ago. And before we go any further: talk to your doctor before starting any new program. I am a retired shop teacher, not a physician.
Start with five tubes, not a gym membership
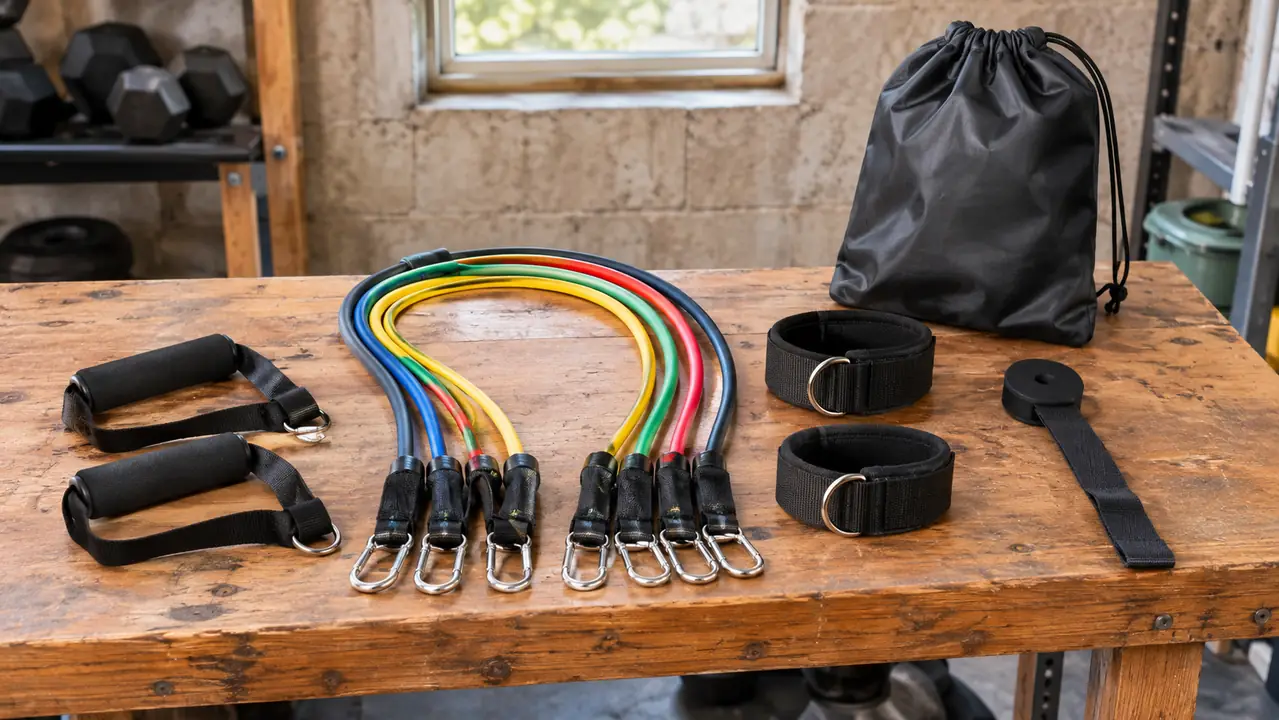
The WHATAFIT set includes five color-coded tubes rated at 10, 20, 30, 40 and 50 lb, two cushioned handles, two ankle straps, a door anchor, a carry bag and a user manual. You can begin with the lightest tube this morning and stack on more as you get stronger. The whole thing weighs about two pounds and carries a 2-year limited warranty.
Amazon Check Today's Price on Amazon →Why Resistance Bands Make Sense After 60
Here is what surprised me. At 61, with a stiff left knee from decades on concrete shop floors and a right shoulder that complained every time I reached overhead, I assumed strength training meant pain. The first time I tried a heavy dumbbell press, my shoulder agreed. I quit for six months. The bands were different. Because the resistance builds as the band stretches, the movement starts easy and gets harder at the end. That gave my shoulder time to warm up before the load arrived.
The other thing I like is that the resistance is adjustable without changing the equipment. The five tubes are rated at 10, 20, 30, 40 and 50 lb, and because they are stackable, you can combine them to find a level that sits between the marked numbers. That is what adjustable assistance levels means in practice. It is also why a set like the WHATAFIT can serve a beginner and a much stronger lifter in the same house. Carol and I share the same set. She uses lighter combinations. I use heavier ones. Neither of us needs a second bag.
And it is portable. The set comes with a carry bag, so it travels. I have taken it along when we visit the grandkids. I have used it on the back porch on summer mornings. The basement is home base, but the bands do not know that.
The Five Steps That Worked for Me
Step 1: Check with your doctor and clear a corner of the house
Before anything else, talk to your doctor. I know it sounds like the boring part of the article, but it is the part that matters most. I wanted to know which movements were safe for my knee and which ones I should avoid with my shoulder. My doctor gave me a short list of things to skip and a longer list of things to try. That one conversation saved me from guessing.
Then find your space. You do not need a home gym. I train in a corner of my basement in our house outside Reading, Pennsylvania, on a rubber mat, right next to my workbench. The whole setup takes up about the footprint of a kitchen chair. When I am done, the bands go back in the carry bag and hang on a hook. If you have a spare corner, a garage wall, or even a spot in the bedroom, you have enough room.
The only thing I would add is a mat if you do not already own one. The floor is hard on the knees, and a little padding makes floor work comfortable. Everything else you need is in the bag.
Step 2: Set up the door anchor and find your starting tube
The door anchor is the piece that turns any door in the house into a gym. You slide the strap over the top of the door, close the door, and loop a tube through the anchor. It takes about thirty seconds once you have done it a few times. I use the basement door because it is out of the way, but I have also used the bedroom door on cold mornings when I did not want to walk downstairs.
Now find your starting tube. The set has five tubes rated at 10, 20, 30, 40 and 50 lb. Here is what nobody tells you: start with the 10 lb tube. Not the 20. Not the 30. The 10. The goal in the first two weeks is to learn the movements with good form, not to prove anything to anyone. The tubes are color-coded, so once you know which color is which, grabbing the right one takes one second.
You can use the tubes alone or stack them together for more resistance. That is the part that makes this set smart. One bag of five tubes gives you more combinations than a wall of dumbbells, and it all weighs about two pounds.
Step 3: Learn the five movements that matter most
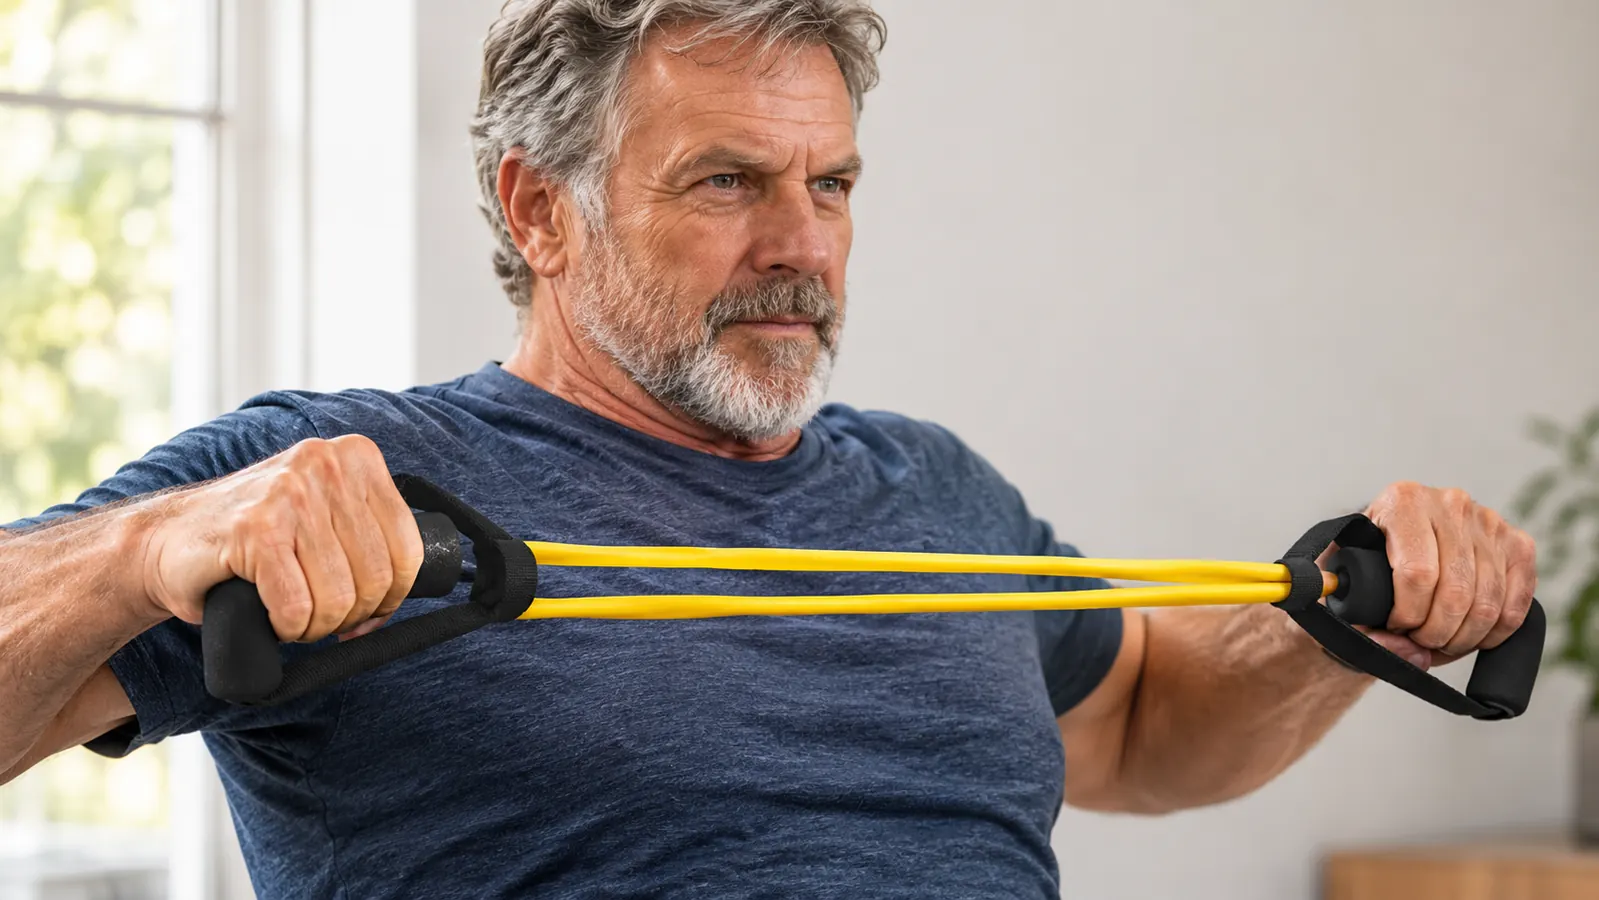
You do not need forty exercises. You need five. Rows, presses, curls, squats, and something for the legs. The cushioned handles make rows, presses and curls comfortable, and the two ankle straps add kickbacks and other leg work. I do all of them either with the door anchor or with the band under my feet.
Here is the routine I still use, three or four mornings a week. Ten to fifteen band rows. Ten to fifteen presses. Ten to fifteen curls. Ten to fifteen squats with the band under my feet. Then a few sets of leg kickbacks with the ankle straps. The whole thing takes about twenty minutes. On stiff days, I do fewer reps and move through the full range of motion slowly.
Form matters more than the number on the tube. If you cannot do a movement without your body twisting or your shoulder hiking up, the resistance is too heavy. Drop down a tube. There is no shame in the lightest band. The shame would be quitting because you started too heavy and hurt yourself.
Step 4: Add resistance slowly, one tube at a time
This is where most people go wrong. They feel good after two weeks, jump up two levels, and wake up the next morning wondering why their shoulder hurts. Progress slowly. Stay with a tube until the last two reps of every set feel smooth and controlled. Then, and only then, move up.
Because the tubes are stackable, you do not have to jump from 10 to 20. You can combine tubes to find a resistance that sits between the marked levels. That is what adjustable assistance levels means in practice. Some mornings I want something between two marked numbers, so I pair a lighter tube with a heavier one and split the difference. The combinations are part of the fun.
One more thing about band math. A 10 lb tube does not feel like 10 lb at the end of the movement. Bands get harder as they stretch, so the resistance builds through the rep. That is different from a dumbbell, which feels the same at the top and bottom. Give yourself a few weeks to get used to that feeling. Your muscles will figure it out.
Step 5: Keep it short and make it a habit
The best routine is the one you actually repeat. Not the one that looks good on paper. Not the one a trainer designed for someone half your age. The one you will still be doing in six months. For me, that means three or four mornings a week, about twenty minutes, before the day gets loud.
Carol sometimes trains with me. She grabs the other handle and we do a few sets side by side. It is not a competition. It is just two people who decided that staying strong is part of the deal. If you have a partner, great. If not, the bands do not care. They are waiting right where you left them.
The routine does not have to be perfect. Some mornings I do the whole thing. Some mornings I do two exercises and call it a win. The product description says these bands are good for daily stretching and workouts, and I believe the stretching part is just as important as the lifting. Five years in, I still look forward to the quiet half hour in the basement.
A Sample Morning Routine
If you want a place to start, here is what a typical morning looks like for me. I come downstairs, put the mat down, and hook a tube into the door anchor. I do two sets of rows first, because rows wake up my back without bothering my shoulder. Then two sets of presses. Then curls. Then squats with the band under my feet. Then I switch to the ankle straps for kickbacks.
The order matters less than the showing up. Some mornings I reverse it. Some mornings I only have time for rows and squats, and I tell myself that is enough, because it is. The goal is not a perfect session. The goal is a Tuesday, a Thursday, and a Saturday where you did something.
What Else Helps
Strength training with the bands is the core of it, but a few other things made the difference for me. Walking. I try to get out most days, even if it is just down the driveway and back. Sleep. At our age, recovery is part of the workout. And protein. I am not going to give you a diet plan, because I am not qualified, but I noticed a real difference when I started paying attention to getting enough protein at breakfast.
The other thing that helped was keeping the bands visible. When the carry bag hangs on a hook by the basement stairs, I use it. When it is buried in a closet, I do not. That sounds too simple to be true, but it is the difference between a routine and a good intention.
Five years ago I could not get off the floor without the couch. This morning I did three sets of band rows before the coffee finished brewing.
Nobody needs to tell you that getting older changes things. You feel it in the morning. You feel it when you stand up from the floor. The good news is that you can do something about it, and you do not need a gym or a rack of iron to start. You need a door, a mat, a set of bands, and the willingness to start with the lightest tube. The WHATAFIT set has been in my basement for years, and it is still the first thing I reach for on training mornings.
Your first tube is the hardest part. The rest is just showing up.
The WHATAFIT resistance band set has carried me through five years of basement mornings. Five color-coded tubes from 10 to 50 lb, two cushioned handles, two ankle straps, a door anchor and a carry bag, all in one package with a 2-year limited warranty. Start with the lightest tube and let the routine build itself.
Amazon Check Today's Price on Amazon →